-
Cutting the panels
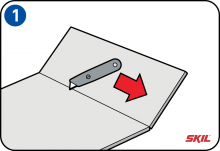
Plasterboard has a plaster core covered on both sides with a cardboard layer. You can easily cut the panels to size using a hobby knife. Working on the top surface, make a deep cut through the cardboard top layer using a wooden plank as a guide. Then break the panel along the line of cut with a single stroke, after which you can cut through the cardboard layer on the other side of the panel.
-
Sawing the plasterboard
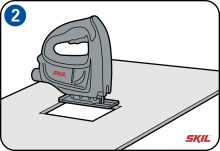
If you don’t plan to use the full length of the plasterboard panels (or if you have to make cut outs for doors and frames), you can cut the panels to size with a normal wood saw or jigsaw. You can make smaller cut-outs for electrical outlets or ducts with a large hole saw, reciprocating saw or jigsaw. A jigsaw is also handy for cutting special shapes or to round-off corners.
-
Pakāpiens
If you need to make a cut-out using a jigsaw, it’s a good idea to first drill a hole along the cutting line – that makes it easier to start sawing. -
Finishing the edges after sawing
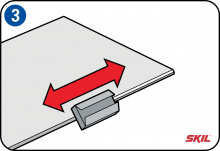
You can finish cut or sawn edges with a surform or a sanding block with coarse sandpaper. So you can finish the joints neatly after mounting the panels, it’s a good idea to give all the cut edges a smooth, beveled finish.
-
Mounting the panels with nails
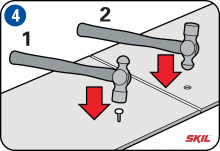
The best kind of hammer to use is a ball-peen hammer, which has a rounded head that lets you recess the head of the nail in the panel. Use nails of around 30 mm length to mount the plasterboard panels. The maximum gap between the nails should be 20 cm, and the nails should be at least 1 cm from the edge of the panel. You can also mount the panels using a electric staple gun loaded with nails.
-
Mounting the panels with screws
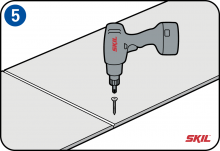
If you use screws you should choose special plasterboard screws with a length of between 25 and 35 mm. These screws are made of stainless steel with a black finish and a sharp, hard point. The easiest way to work is with an electric drill/driver or screwdriver. If possible use a special screwdriver bit for plasterboard, or a drill/driver with adjustable torque settings so the screws don’t go straight through the plasterboard. You can drive the screws in without the need to drill a starting hole. The maximum gap between screws should be 25 cm.
-
Finishing the joints
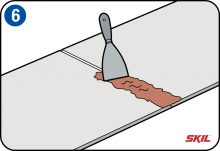
The plasterboard surfaces and the joints between the panels must be dust-free and clean. Note: you should only start finishing the joints when the plasterboard is dry and at room temperature. Fill the joints with a putty knife using sealant. After drying for 24 hours you can apply a second layer if necessary. When that is dry you can smooth the joints with sandpaper.
-
Finishing inside corners
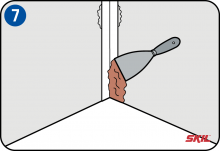
The best way to finish the corners is to use sealant tape. First apply sealant to both corner surfaces. Then fold the sealant tape in half along its length and fit it into the corner. Press it firmly into the sealant and cover it with a top layer of sealant. Remove excess sealant with a putty knife and smooth it over. Alternatively you can use self-adhesive fiberglass sealant tape.
-
Finishing outside corners
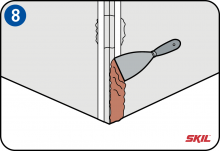
You can finish outside corners with a reinforcing strip. Cut the strip to length and fold it at the right angle. Apply sealant to both corner surfaces and press the reinforcing strip firmly into the sealant. Finish the corner smoothly with a putty knife and sealant. Sanding is only necessary to remove irregularities in the joint. You can also use an aluminium corner strip for extra protection.
-
Protect the wall against damp
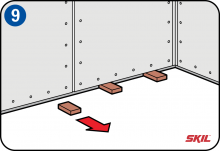
Plasterboard can’t withstand damp. To keep rising damp out of the panels, you can raise them 1 cm off the floor on a number of smaller lengths of plasterboard. These can be removed later, when the panels have been fixed in place.
-
Pakāpiens
Never carry plasterboard panels horizontally, but instead hold them vertically by the edges. Store plasterboard in dry conditions, off the floor on wooden strips.

