-
Choosing the color
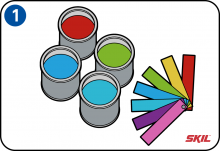
Choosing the right matching colors is an art in itself, but there’s a useful rule of thumb: when you’ve chosen a color, have it mixed at half-strength or in a lighter version. If you choose a color by yourself, you’ll find that it in many cases turns out to be much darker or brighter that you expected.
-
Ceiling color
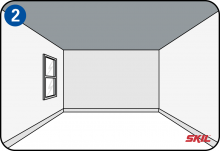
Most people choose tints of gray or brown, in contrast to pure primary colors. Your ceiling doesn’t always have to be white! If you’ve chosen a color for your walls that isn’t too dark, you can also use it for the ceiling. If you choose a difference, contrasting color, that’s sure to influence the ‘feel’ of your room. Of course the lighting also has an effect on the way your room looks. Indirect lighting on the ceiling will reflect the ceiling color downwards.
-
Do a trial first
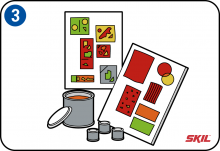
Before you start, you can cut some pictures and scenes out of magazines and stick them onto a piece of cardboard. That will help you to choose the ‘feel’ you want to create. If you’re not quite sure, it’s worth buying a few small quantities of paint and applying them on a piece of card or board so you can compare them. Some paint stores sell special ‘mood boards’ in different colors and tints. You can also paint a 244x60 cm plasterboard panel in the desired color. If you place it outdoors in sunlight you can see what the color really looks like. Then place it in your interiors with artificial lighting and see the difference!
-
Preparing to paint the room
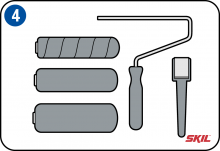
Empty your room, cover heavy furniture and other objects that are hard to move using plastic foil, and collect all the painting tools and materials you need like paint rollers and paint pads. If necessary, scrape off all loose paint. Remove dust and dirt from the plinths, windows and doors with a cloth.
-
Repairs
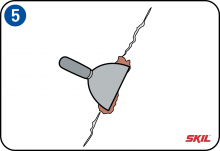
Remove all nails and screws from the wall, and fill all the holes, cracks and other irregularities. Follow the instructions for drying time as stated on the tin. Then sand the filled areas to give a smooth surface so the repairs are invisible. Apply masking tape where necessary on complex and difficult places.
-
Painting techniques
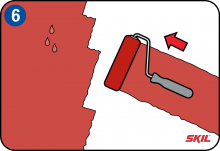
Always make sure you leave a wet painted edge, and always paint from dry to wet and from top to bottom. Your brush or roller will them leave fewer marks on the painted surface, and the transitions will not be so visible. Also don’t make the tracks in the paint too long. Make sure you use enough paint so you get a smooth, even result – if you don’t use enough paint, you’ll get a patchy appearance.
-
Attention to detail
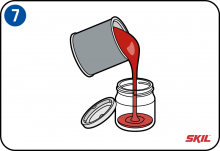
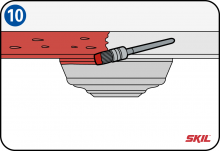
Take the time to stir well before you start. When you’re painting small details, pour a small amount of paint into a pot. Use a narrow brush for the corners and edges, this makes it a lot easier to paint small lines and details. Then continue to paint the walls with a roller. If you like to use masking tape along the plinths and window frames, it’s best to first paint the larger areas with a roller, and then to paint the edges and other obstacles.
-
Sweep to brush clean
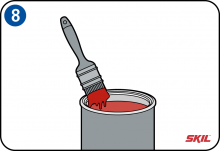
First moisten the brush before you start – this helps to stop the paint from creeping upwards. Dip your brush into the paint by about 1 cm, then sweep one side of the brush clean and on the edge of the paint pot. This will help to prevent the paint from dripping off the brush. It also avoids applying too much paint, and helps to keep the brush clean for longer.
-
Work from dry to wet
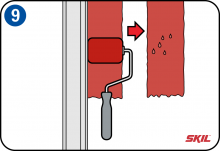
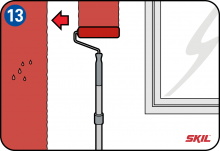
Apply the paint in long, uninterrupted lines. Working with too short applications is one of the most common mistakes. If you’re using a roller, it’s best to aim to apply tracks of around 2 meters at a time. Paint from the ceiling to half-way down the wall, and then from there down to the floor.
Then continue at the left or right side with the following track of paint. For smaller areas or near to door or window frames, use a narrow paint roller. Note this will always be a wet painted edge, and you should work from the dry to wet areas. -
Spread the paint with the brush
When you’re using a brush, it’s best to first spread the paint to the left and right, or up and down, whichever you prefer. Make long brush strokes working from the dry side, and complete the paint track to the wet side. After drying, paint the 2nd coat. This gives a better and more even result. If you’re using a dark color you may need to use three coats! Allow the 1st coat to dry completely before you apply the 2nd coat. Check the drying time on the paint label.
-
Cleaning brushes and roller
If you’ve spilt any paint, and it’s still wet, remove it immediately with a damp cloth. If it’s already dry, it won’t be so easy to clean it off. Keep the brush or roller damp while you’re waiting – you can put it in a plastic bag or cover it carefully with plastic foil. Then put the brush or roller in the refrigerator after you’ve wrapped it; this may sound a bit strange, but it really does work. The cold slows down the drying of the paint. Then just take your brush and roller out of the refrigerator 30 minutes before you need them, and they’ll still be flexible and ready to use. If you’re using acrylic paint, clean your brush with water and a small amount of determent. Rinse until no more paint comes out of the brush. Smooth the brush back into its original shape and allow it to dry (see also the step-by-step instructions for cleaning).
-
Removing excess paint
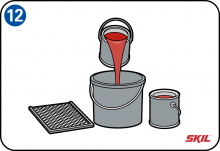
If you’re painting large surfaces, you can use a special grid to remove excess paint from your brush. Or if you’re using smaller tins, pour the contents into a 5-liter bucket. A paint grid is a rectangular metal or plastic screen that hooks onto the edge of the bucket. Fill the bucket half-full with paint and hang the grid into it. Dip the roller in the paint, and roll the excess paint off in the grid. When you’re finished, leave the grid inside the bucket and click the lid on top of it.
-
Painting inside walls
Take the roller and extension handle and pour the acrylic paint into the tray or use a bucket with a grid. Decide which wall you want to do first, and paint it in smooth, even tracks. While you’re waiting for the first coat of paint to dry, wrap the roller or brush in plastic foil. Then apply a 2nd coat. Pour a little acrylic paint into a small bowls, and paint the corners and edges of the room using a small brush. When you’ve finished, clean the brush, bowl, bucket and roller. If you’ve used masking take, remove it as soon as the paint has dried.

